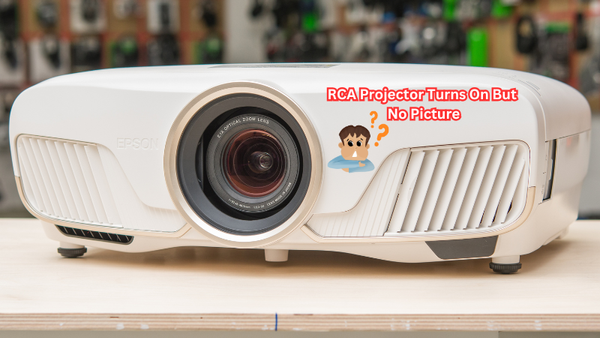
Epson projectors are widely used in classrooms, conference rooms, and home theaters for their high-quality projection capabilities.
One useful feature of these projectors is the ability to invert images, which allows you to project the image upside down or right-side up depending on your needs. This can come in handy when mounting the projector on the ceiling or projecting onto a specialized surface.
In this guide, we will discuss how to invert an image on an Epson projector using both manual and remote control methods. We will also provide tips on troubleshooting common problems during the inversion process. By following these steps, you can easily adjust your projected image to fit any setting or audience without having to physically reposition the projector.
Why Invert an Image?
Inverting an image on an Epson projector has many practical uses. One of the main reasons for inverting an image is to accommodate different mounting positions or projection surfaces. For example, if you are using a ceiling mount, inverting the image allows you to project it correctly onto the screen without having to tilt or rotate the projector itself.
Another reason for inverting an image is for creative purposes. In some presentations or performances, projecting an upside-down image can add a unique and visually appealing element. This is also useful when showing images or videos that were filmed with a camera mounted upside down.
Additionally, inverting an image can be helpful when using specialized projection surfaces such as rear-projection screens or glass panels. By flipping the image, you can project it onto these surfaces without any distortion or loss of quality.
Manual Inversion Method
The manual inversion method involves adjusting the projector's settings using its control panel buttons. Follow these steps to manually invert an image on an Epson projector:
- Start by turning on your projector and selecting the input source for your image.
- On the control panel, press the Menu button to access the projector's menu options.
- Use the arrow keys on the control panel to navigate to the "Image" or "Settings" tab.
- Within this tab, look for an option called "Projection" or "Image Orientation."
- Select this option and use the arrows again to choose between "Normal," which displays the image right-side up, or "Inverted," which projects it upside down.
- Once you have selected your desired orientation, press Enter or OK on your remote control to save the changes.
- Test out your new projection by displaying an image or video and making any necessary adjustments.
Remote Control Inversion Method
If your Epson projector comes with a remote control, you can also use it to invert the image. Follow these steps:
- Turn on the projector and select your input source.
- On the remote control, press the Menu button to access the projector's menu options.
- Use the arrow keys on the remote to navigate to "Image" or "Settings."
- Look for an option called "Projection" or "Image Orientation."
- Choose between "Normal" or "Inverted" using the arrows and then press Enter or OK.
- Test out your new projection by displaying an image or video and making any necessary adjustments.
- If your remote has a dedicated invert button, you can also use it to quickly toggle between the two image orientations.
Does A Projector Screen Need To Be Inverted?
In most cases, a projector screen does not need to be inverted. This is because the image inversion happens within the projector itself, so it doesn't matter if the screen is right-side up or upside down.
However, there are certain scenarios where you might want to invert your projector screen as well. For example, if you are using a rear-projection screen and have inverted the image on your projector, then you may also need to flip the screen so that it displays correctly.
Additionally, some projectors have an option for ceiling installation which requires you to mount the projector upside down. In this case, you will also need to invert the screen in order for the image to be displayed properly.
It's essential to note that not all projectors have the ability to invert a screen, so it's important to check your projector's specifications before attempting this method.
Troubleshooting Common Problems
If you are having trouble inverting an image on your Epson projector, here are some common issues and how to troubleshoot them:
- The image is still projected upside down after following the inversion steps: try adjusting the keystone correction or lens shift settings on your projector. These controls can sometimes affect the orientation of your image. Plus, check if your projector has a dedicated "ceiling" or "front/ rear" option that needs to be selected.
- There is no invert option on the control panel or remote control: not all Epson projectors have the ability to invert images. Check your projector's specifications and user manual for more information.
- The colors or contrast look distorted after inverting the image: this could be due to incorrect placement of the projector or screen. Make sure the projector lens is perpendicular to the screen and that there are no obstructions blocking the projection path.
- The image is blurry or distorted after inverting: try adjusting the focus and zoom settings on your projector. Additionally, check that the projection surface is clean and free of any wrinkles or creases.
By following these tips, you should be able to successfully invert an image on your Epson projector and achieve the desired projection orientation. Remember to always refer to your projector's user manual for detailed instructions and troubleshooting techniques specific to your model.
Can You Undo An Inverted Image?
Yes, you can easily undo an inverted image on your Epson projector. Simply follow the same steps for manual or remote control inversion, but instead of selecting "Inverted," choose "Normal" to revert back to the original orientation.
It's also important to note that inverting an image does not permanently alter the original file. The inversion only affects the projection of that particular image on your projector.
Furthermore, if you have made any keystone correction adjustments while the image was inverted, those settings will be reset when you switch back to normal projection mode. This means you may need to readjust these settings once again for optimal image quality.
Also, in some cases, your projector may automatically revert back to normal orientation after a certain period of time or when you turn it off and on again. This is something to keep in mind if you find that your image has returned to its original orientation without manually changing any settings.
How Much Does It Cost To Invert An Image On An Epson Projector?
Inverting an image on an Epson projector is a standard feature and does not require any additional cost. However, to be able to invert the image using a remote control, your projector needs to have this functionality included.
The cost of an Epson projector with image inversion capabilities will vary depending on the model and specifications. Entry-level projectors may start at around $500, while more advanced models can range up to several thousand dollars.
Additionally, you may need to consider the cost of accessories such as a ceiling mount or rear projection screen if you plan on using these features in conjunction with image inversion.
It's also worth noting that unlike manual inversion, using a remote control may require the use of batteries which will need to be replaced periodically. This is an additional cost to keep in mind when considering the overall cost of inverting an image on your Epson projector.
Is Inverting An Image Necessary For All Projector Setups?
No, inverting an image is not necessary for all projector setups. As mentioned earlier, the inversion of an image only affects its projection and does not permanently alter the original file.
If you are using a standard front-projection setup with your Epson projector, there is no need to invert the image as it will be displayed correctly on a regular screen or surface. However, if you are using a rear-projection setup or plan on mounting the projector upside down, then image inversion may be necessary.
Furthermore, some projectors have a built-in feature that automatically detects the orientation of the projector and adjusts the image accordingly. In this case, manual or remote control inversion is not necessary.
Ultimately, it depends on your specific setup and the capabilities of your projector. It's always best to consult your projector's user manual or do some research on your particular model to determine if image inversion is needed for your specific setup.
Mistakes to Avoid When Inverting an Image on an Epson Projector
While inverting an image on your Epson projector may seem like a simple task, there are some common mistakes that can be easily avoided with proper knowledge and preparation. Here are some mistakes to avoid when inverting an image:
- Not checking the projector's specifications: as discussed earlier, not all projectors have the ability to invert images. Make sure to check your projector's specifications and user manual before attempting to invert an image.
- Incorrect placement of the projector or screen: if the projector lens is not perpendicular to the projection surface, this can result in a distorted or blurry image after inversion. Ensure that both the projector and screen are properly aligned.
- Forgetting to adjust keystone correction or lens shift settings: these controls can affect the orientation of your image, so it's important to make any necessary adjustments before inverting.
- Not having a clear projection path: any obstructions in the projection path can cause distortion or blurriness after inversion. Make sure to clear any objects that may be blocking the projected image.
- Not using a clean and flat projection surface: wrinkles, creases, or dirt on your projection surface can also affect the quality of the inverted image. Clean and smooth out the surface before projecting.
By avoiding these common mistakes, you can ensure a successful and hassle-free experience when inverting an image on your Epson projector. It's always best to refer to your projector's user manual for specific instructions and troubleshooting techniques related to your model.
FAQs
Are all Epson projectors capable of inverting images?
Not all Epson projectors have the capability to invert images. It's important to check your projector's specifications and user manual before attempting to invert an image.
Can I manually invert an image on my Epson projector?
Yes, you can manually invert an image on your Epson projector by accessing the settings menu and selecting "Inverted." However, this may not be available on all models.
Do I need special equipment to invert an image on my Epson projector?
No, you do not need any special equipment to invert an image on your Epson projector. However, some models may require a remote control with this functionality included.
Will image inversion affect the quality of my projected image?
In most cases, image inversion will not affect the quality of your projected image. However, it's important to make sure that the projector and screen are properly aligned for optimal image quality.
Conclusion
Inverting an image on an Epson projector is a simple and customizable feature that can enhance your projection experience. By understanding the basics and avoiding common mistakes, you can easily invert images to suit your specific setup without incurring any additional cost.
Just remember to consult your projector's user manual for specific instructions related to your model and always make sure to properly align your projector and screen for the best possible image quality.
So, it's definitely worth considering this feature when looking for a new projector or setting up an existing one. Happy projecting!

